"Be the kind of woman that when your feet hit the floor each morning, the devil says...."Oh crap! She's up!" Unknown

Monday, February 28, 2022

A New Quilt

 This past week I started a new quilt!
This one is not from my UFO or kit cabinet,
but is being made of fabrics pulled from my stash.
 
Last year at Quilt Camp we all decided to make the same
pattern with our choice of fabrics
and these quilts will be used on our beds while at quilt camp.
 
The pattern we are using is
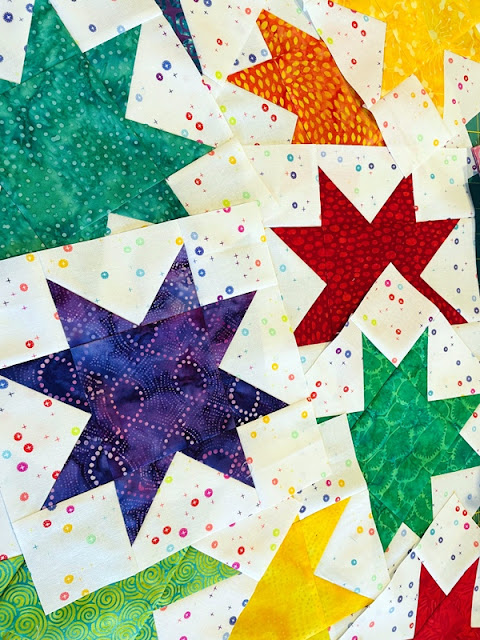
"Lucky Stars" by Atkinson Designs.
 
I have wanted to make this quilt for some time
using Kaffe, Batiks and Polka Dots....
my three favorite things in fabric!
 
This is going together quickly and I love the blocks.


Most of the batik and polka dot star centers are pieced.
I'm waiting on more of the polka dot fabric.


I've gone through my Kaffe scraps and pulled
pieces that are large enough to cut into the strips needed.


I had to make one block to give me inspiration!

This is going to be one happy quilt!


Thursday, February 24, 2022

Jelly Roll Rug

 I have wanted to make a Jelly Roll Rug for a very long time.
The batting round had been purchased long ago on sale
and the Kaffe Jelly Roll was waiting in my cabinet.

They came out next to play!
I figured this would take me a couple of weeks to make,
but it went together very quickly.


Stitching the strips together end to end
and then sewing the whole thing together with
the batting inside went quickly.
It was fun seeing this big ball ready to 
be made into a rug.


The other night I put an audio book on and just sewed away.
There are a couple of things I would do differently if I made
another rug, but I'm pleased with the results.


For now it's on the floor in my hidey hole, in front
of the cutting table.


I just love Kaffe fabrics!!
 
I'm linking to Design Wall Monday.


Happy Quilting!


Wednesday, February 23, 2022

Ryan's Quilt is Finished

 This past weekend we took a quick trip to Pennsylvania
to visit my brother and his family.
I had not intended on having his quilt finished before we went,
but it was finished.
 
It was delivered and he loved it.


The pattern is Windigo, but is no longer
available as a single pattern.
 
 
I quilted the long rows in the ditch and then
quilted around the border with straight lines.
I normally stitch the binding down by hand,
but I needed one more row of stitching on the front
and it stitched the binding down perfectly.


He was thrilled with it and loved the design
and colors.
It looks great in their home, too.


Guess what came out of the "to be made" cabinet next!


 The supplies have been patiently waiting for their turn.


Happy Quilting!

Friday, February 18, 2022

Dragonfly Baby Quilt

 With the arrival of 2022, my quilting mojo really returned.
It feels so good to be clearing out piles of quilt parts and kits.

The latest finished top was a pile of parts I had made
for another baby quilt last year.
For some reason I went to town cutting and sewing the various
pieces and parts and had a lot left over.
Maybe I was going to make the original quilt larger?
Who knows?!?!?
What I do know is another pile is gone and another top
is finished!!


Here is the original quilt.
It's a Robin Pickens Pattern
called Emilia.
 
I loved making this quilt for my grand niece
and then made it again as a Christmas tree skirt for
my niece and her husband.
 
My first thought was to make another quilt just like this one,
but as I was sewing parts together,
other thoughts came into my head.
 
 I sewed the large triangles together with the small ones
and started playing with these blocks.


I like this layout with the pinwheels, but kept moving the blocks around.


This layout was fun, too, but I kept playing.


Then I landed on this one.
This is it! 
Now what to do for borders?
At first I was going to use the lime green and 
turquoise I had used in the original quilt,
but they seemed too harsh for this one.
I had a number of HST's leftover and
started to play with those in the border.


Here is the finished top!
It was fun to just play and move parts around
on my design wall.
 
There are several babies coming this year,
so this will get quilted and set aside for one of them.
 
Happy Quilting!


Monday, February 14, 2022

Teddy's Quilt

 Last year a dear friend of my daughter's was expecting their first child.
My daughter asked if I would make a baby quilt for them
and you know I said "Of course!". 
She told me the nursery theme would be the National Parks
and they were having a boy who would be named Theodore and called
"Teddy". 
Elizabeth Hartman's teddy bear pattern came immediately to mind.
I searched for something to tie in the National Parks theme
and found this panel of one of their favorite parks, since they 
lived in Virginia.

The quilt was well underway when this friend went into labor.
Sadly, Teddy was stillborn.
I put the quilt aside, not being able to finish it at that point.

Recently my daughter had a conversation with her friend
about Teddy and told her I had started a quilt for him.
My daughter asked if she would like it and her friend said
she would at some point.
It would be a nice way to honor and remember Teddy.


The quilt top was finished, but the backing needed to be pieced.


I pulled fabric to enlarge the panel for the backing
and got it ready to quilt last week.


I love the simple grid quilting with this quilt.
The teddy bears didn't need much... they already shine.


My little red headed love bug was helping with the photos
while we were at my daughter's house.


"Teddy" is ready to gift to Teddy's mama
whenever she is ready.
The happy news is they are expecting again,
so another baby quilt will be made soon.
 
Today I'm linking to Design Wall Monday.
 
Happy Quilting!


Thursday, February 10, 2022

Ryan's Quilt

You know that feeling you get when you've finished
the top of a quilt that has been rather difficult
and time consuming to make and breath a sigh of relief?
(This quilt was started in the beginning of last year and then was not touched.)
I had that feeling yesterday.....

until I looked at the photograph I sent to my daughter to show her.


Does anyone see any issues here?
I'm amazed at how when looking at something on my 
design wall it can look perfect.
Then the photograph shows an error plain as day.
(Lower left corner... yellow and green triangles are switched.)

Then, as I was looking more closely at the photo,
I saw two areas where the wrong color triangles were used.
UGH!!

The areas are circled below.
If you hadn't seen the pattern, you might not have noticed,
but I am VERY familiar with the pattern.


The mistakes were fixed and the top is waiting for a good
pressing and the 3" blue borders. 


I learned something while making this quilt.
I had started pressing the seams open on all of the
triangles and rows and then decided to press them to one side to see if it mattered.
I am MUCH more accurate at matching points when the seams
are pressed to the side.
My obsessive self wanted to redo the first 6 rows because
they are not as accurate,
but instead I ripped the most offensive corners and redid them. 

Hopefully this will be quilted by next weekend when I will be seeing
the brother to whom this will be given.

Happy Quilting!


Thursday, February 3, 2022

New Couch Pillows

 When we moved into this house,
we needed to buy some new furniture.
Our old furniture was old and too big for the spaces here.
I had no idea that furniture was backordered
and how long it would take to get it to us.
 
Anyway, when we ordered the couch
I asked if the pillows could be made with different fabric.
Well, of course they could be....
for $200 EACH!!!
I then asked if I could purchase the fabric I had
found in the store to make my own pillows.
Well, of course I could....
for $130 per yard!!!
 
I said a big No Thank You.
 
Thankfully, I can sew.
And I am pretty quick at making pillows.
 
In two afternoons I had four new pillows made for my new couch.


These were the pillows that came with the couch.
I did not want pillows made from the exact same
fabric as the couch, which is actually a dark navy blue, not gray.


After a fun couple of hours of sewing,
I had two new pillow covers.
These motifs were just wanting to be quilted,
so I had fun playing with some of the designs.


This is my new couch with the four pillows I made
for a LOT less than $200 each!
I do have to say... the pillow inserts that came with the couch pillows
are really, really nice.
 
Onto the next project!
 
Happy Quilting!

Monday, January 31, 2022

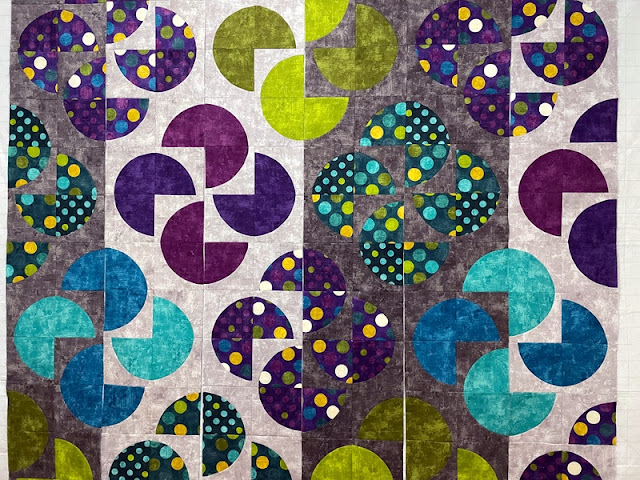
Progress on PacMan Quilt

 Someone asked me yesterday if I ever sleep.
Well, I was awake a little after 3am today
and decided to get up at 4am to make use of this awake time.


In the predawn hours I was able to get the last two sections
of this quilt sewn together.
The blocks had been sewn and trimmed, 
so the rows needed to be made.


I've been calling this the PacMan quilt because
the design reminds my husband and me of the old
PacMan game.
I doubt I keep the name, but it is funny.
 
Now the rows need to be sewn together
and the top will be finished.
This is one more kit from my cabinet that will be done!


After cutting the shapes with my Accuquilt,
I had all of these shaped pieces left. 
(Sorry for the blurry photo... my phone needed
a rest.)

One of my goals this year is to cut down scraps
as soon as I'm finished with a quilt top or project.
Hopefully my scraps won't overwhelm me if I can 
keep doing this.


I now have two piles of 3 1/2" squares to use in another quilt.

I am linking to Design Wall Monday today

Happy Quilting!
Sunday, January 23, 2022

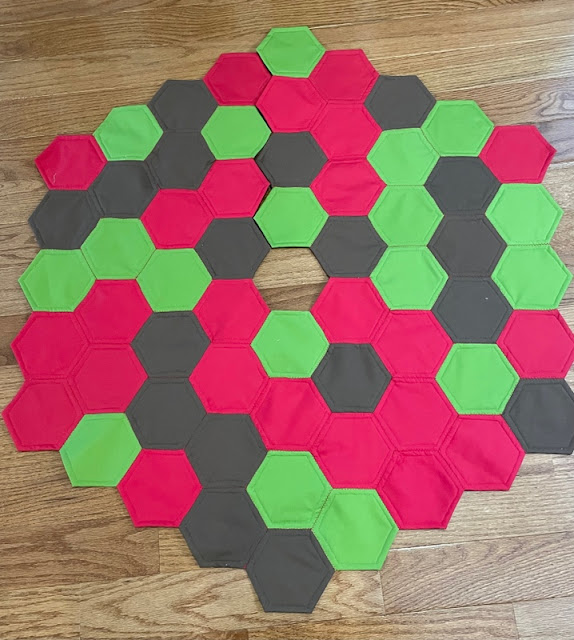
Kitchen Tree Skirt Finished

 I don't remember when I started making this little 
Christmas tree skirt, but it was a while ago.
The parts were cut and some were assembled
and then they were all put into a bag and forgotten.
 
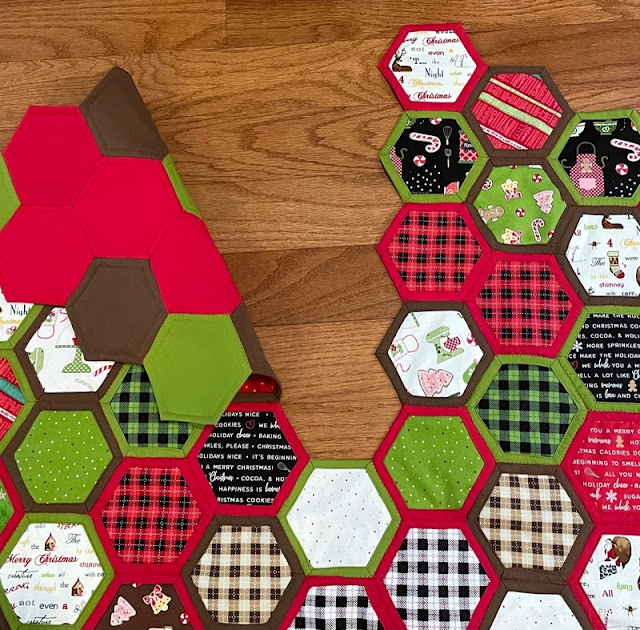
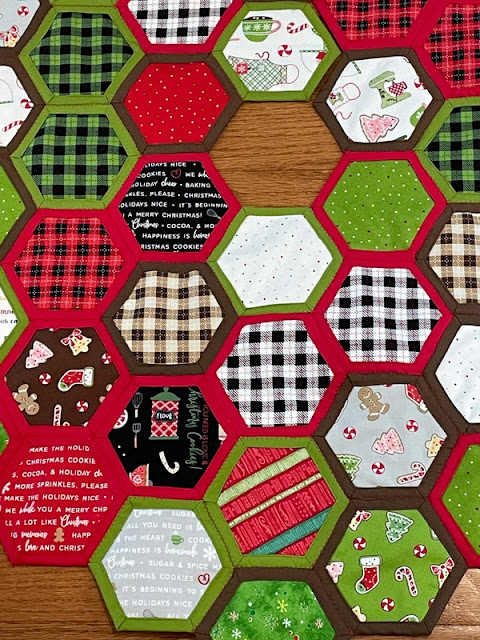
 This kit came off the shelf last week and is now a finish!
 
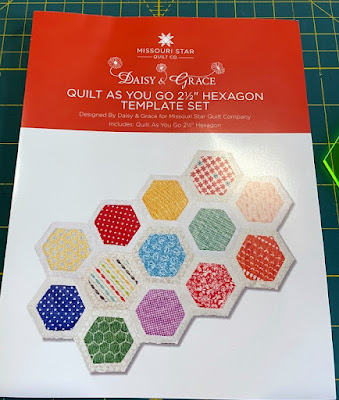
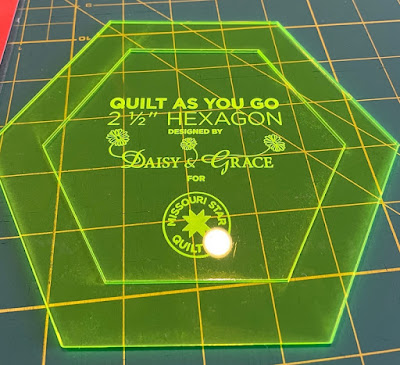
I watched the Youtube video from Missouri Star for using these templates
and had a charm pack with cooking fabrics already.
 
At Christmas time I put a tree in my kitchen
with kitchen related ornaments on it.
The tree skirt I've used was an old one and needs
to be retired.
Now is the time!


 This is the pattern and the templates used
are below.


These hexagons went together very quickly.
There is a piece of batting in each hexagon,
cut the same size as the inner fabric.
The hexagons were zigzagged together
with a narrow stitch.


I didn't pay any attention to the placement of the backing
solid fabrics and like the randomness of the back.


I left the half seam in the back unstitched so it can be
placed around the tree.


I see another tree skirt made like this in my future.... 
Like maybe for my other niece who needs one.  :) 
 
 
The next kit has been chosen and work has started!
 

More to come soon!!
 
I'm linking to Design Wall Monday today. 
 

Happy Quilting!

Thursday, January 20, 2022

Christmas Tree Skirt for My Niece

 Those of you who have been following me for a while
know that my go to wedding gift (when appropriate)
is a quilted Christmas Tree Skirt.

Two of my nieces were married before I started this tradition,
so I told both of them that I would make them Christmas tree skirts,
especially since neither of them has one.

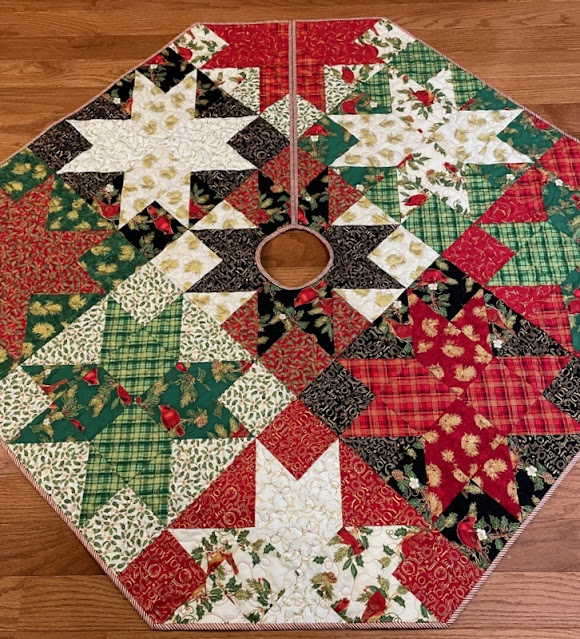
Last year I found a layer cake and a pattern to make one niece
her tree skirt.
The patter, layer cake, backing and binding fabrics were all in a bag
in my "kit cabinet", so they all came out to play.

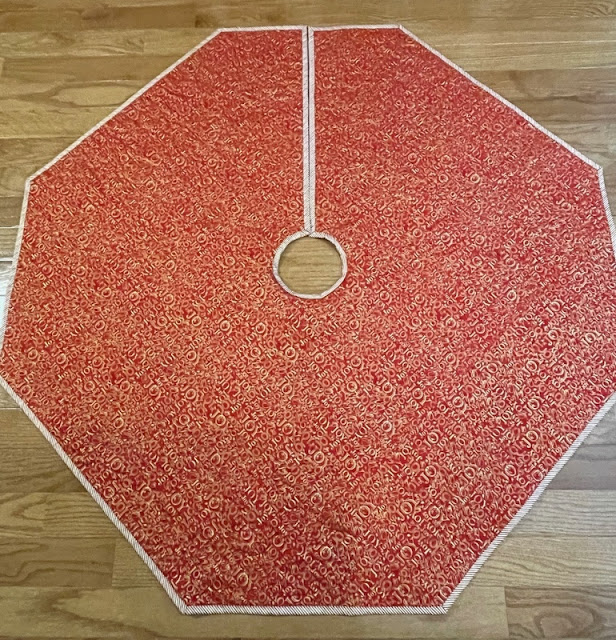
Here is the finished tree skirt!


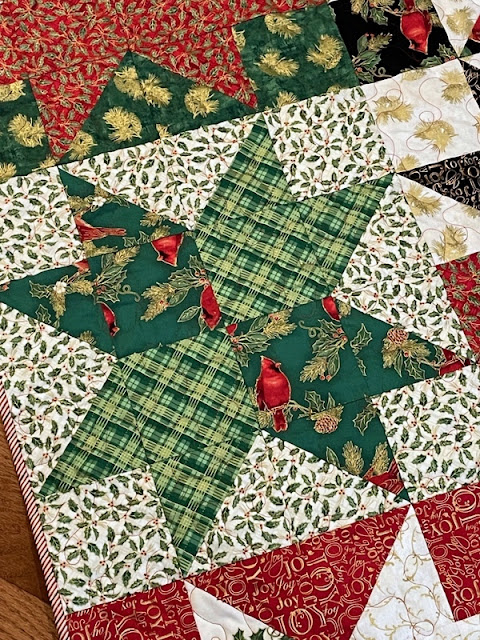
This tree skirt went together so quickly
and used such a neat way to cut the various pieces
from the layer cake.


The fabrics all have some sparkly gold in them
and really makes the tree skirt shine.


This tree skirt could be reversible, if desired.
The backing fabric has a whole lot of JOY in it!!


This will be put away until the next time I see my niece.
A little Christmas in the early part of the year will be fun.


Happy Quilting!
Monday, January 17, 2022

Farm Pinwheel Baby Quilt Finished

 This top was sewn together sometime last year and has been
waiting to be quilted and finished.
 
Last week was the time.
I pieced a backing and basted the layers together.
 
Now it's a finished baby quilt, ready for donation!


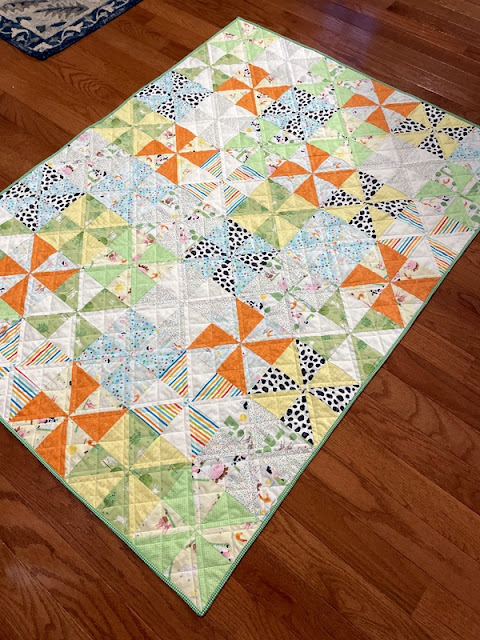
This top was made from a package of charm squares
and yardage.  Some of the farm fabrics are so cute!


I am really liking the simple grid quilting these days
and love how it looks with this design.


You can see a few of the farm prints in this photo.


The backing was pieced from fabric in my stash.
The blue is not this dark in person.
 
Green gingham binding was used to finish it 
and it's ready for donation.
 
I'm linking to Design Wall Monday today.
 
 
Happy Quilting!
Sunday, January 16, 2022

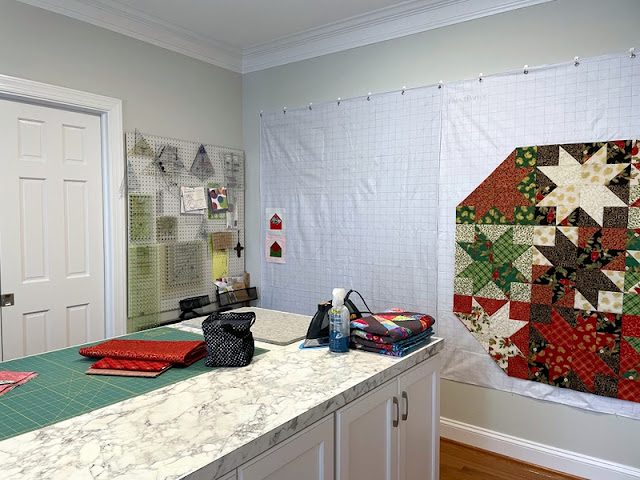
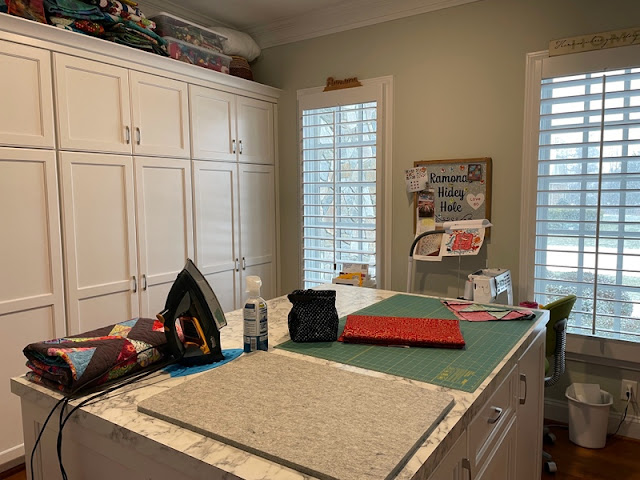
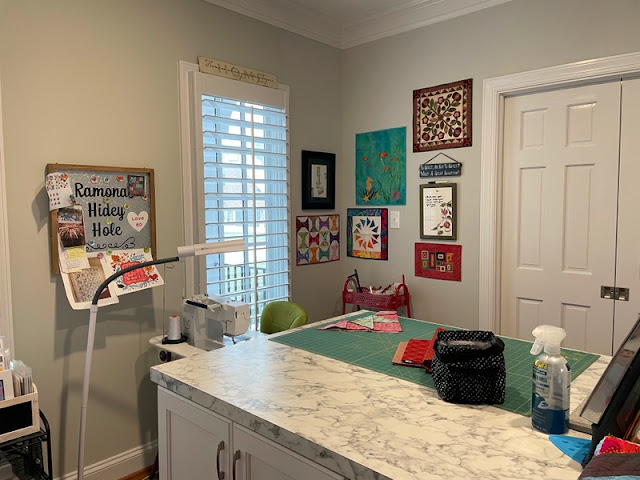
My Hidey Hole is Finished!

 I moved into my house back in April
and left a wonderful sewing room/office behind.
We were downsizing and that meant my sewing room
had to be smaller, too.

Well, there were several things needed in my new sewing room.
(Years ago my daughters started calling my sewing room
my Hidey Hole, and that's what it's been called since.)

The first thing my new hidey hole needed was a wall.
The room was probably an office for the previous owners
and was totally open to the front hall except for two huge pillars.
That would not work for my hidey hole!
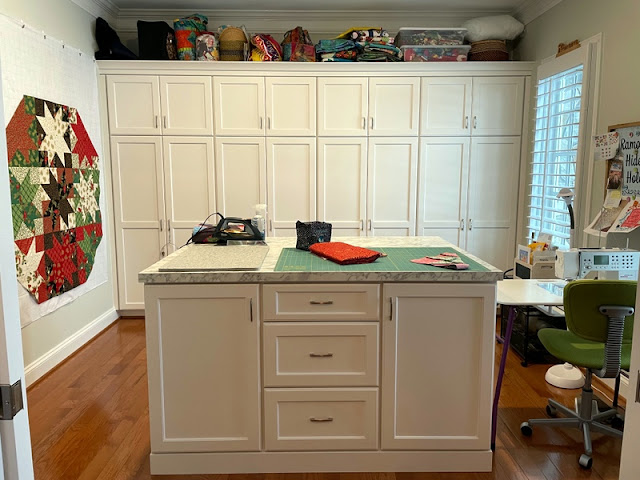
The second thing my new room needed was cabinets and a cutting table.
 
Finally in December, the work was done.
The cabinets were installed and the wall was built with two pocket doors.
 
Since then I have been unpacking, organizing and getting the room
set up and ready to use.
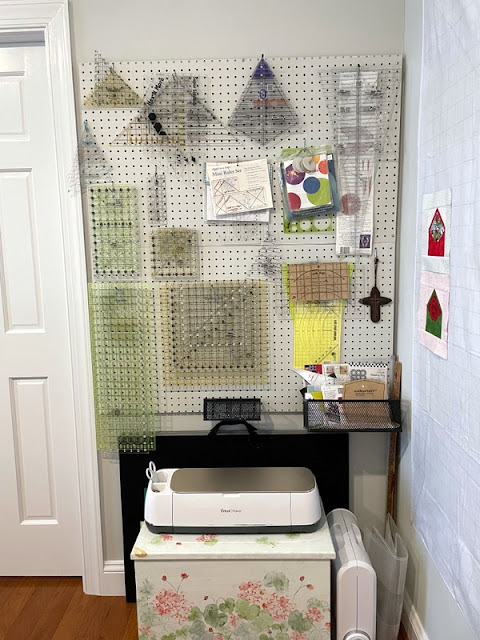
This morning I did the last thing I wanted to do.... hung the peg boards.
 
At first I was very hesitant about downsizing so much,
but I am thrilled with how the room came together.
One thing that will have to happen is I will need to keep it neat
and organized.  NOT my strong suit!
 
Anyway.... my Hidey Hole!!


I am so fortunate and thankful to have a room
dedicated to my sewing.
There was a time when the dining room table was my sewing space.


 Having my rulers out and easily accessible will be wonderful.


In my old house, my design wall was flannel covered insulation boards,
screwed to the wall.   I really like those, but over time the flannel
stretched and I couldn't easily remove the boards to replace it.
posted the design wall she uses and how she hung it.
I decided to give her method a try.


These two windows give the room a lot of natural light.
There are recessed lights for night time sewing.
The one challenge is there isn't really room for an
ironing board.  I bought a larger wool ironing mat
and will use the ironing board in the hallway when I
need something larger.


In my old hidey hole, I didn't have much wall space at all
and had nowhere to hang my little quilts.
I've started to hang them up and love how they brighten the room.
A friend made the magnetic board for my birthday last year. :)


The creative juices are bursting now that my room is finished.
It will be fun to see what is created in here.
 
 
Happy Quilting!