"Be the kind of woman that when your feet hit the floor each morning, the devil says...."Oh crap! She's up!" Unknown

Monday, January 31, 2022

Progress on PacMan Quilt

 Someone asked me yesterday if I ever sleep.
Well, I was awake a little after 3am today
and decided to get up at 4am to make use of this awake time.


In the predawn hours I was able to get the last two sections
of this quilt sewn together.
The blocks had been sewn and trimmed, 
so the rows needed to be made.


I've been calling this the PacMan quilt because
the design reminds my husband and me of the old
PacMan game.
I doubt I keep the name, but it is funny.
 
Now the rows need to be sewn together
and the top will be finished.
This is one more kit from my cabinet that will be done!


After cutting the shapes with my Accuquilt,
I had all of these shaped pieces left. 
(Sorry for the blurry photo... my phone needed
a rest.)

One of my goals this year is to cut down scraps
as soon as I'm finished with a quilt top or project.
Hopefully my scraps won't overwhelm me if I can 
keep doing this.


I now have two piles of 3 1/2" squares to use in another quilt.

I am linking to Design Wall Monday today

Happy Quilting!

Sunday, January 23, 2022

Kitchen Tree Skirt Finished

 I don't remember when I started making this little 
Christmas tree skirt, but it was a while ago.
The parts were cut and some were assembled
and then they were all put into a bag and forgotten.
 
 This kit came off the shelf last week and is now a finish!
 
I watched the Youtube video from Missouri Star for using these templates
and had a charm pack with cooking fabrics already.
 
At Christmas time I put a tree in my kitchen
with kitchen related ornaments on it.
The tree skirt I've used was an old one and needs
to be retired.
Now is the time!


 This is the pattern and the templates used
are below.


These hexagons went together very quickly.
There is a piece of batting in each hexagon,
cut the same size as the inner fabric.
The hexagons were zigzagged together
with a narrow stitch.


I didn't pay any attention to the placement of the backing
solid fabrics and like the randomness of the back.


I left the half seam in the back unstitched so it can be
placed around the tree.


I see another tree skirt made like this in my future.... 
Like maybe for my other niece who needs one.  :) 
 
 
The next kit has been chosen and work has started!
 

More to come soon!!
 
I'm linking to Design Wall Monday today. 
 

Happy Quilting!


Thursday, January 20, 2022

Christmas Tree Skirt for My Niece

 Those of you who have been following me for a while
know that my go to wedding gift (when appropriate)
is a quilted Christmas Tree Skirt.

Two of my nieces were married before I started this tradition,
so I told both of them that I would make them Christmas tree skirts,
especially since neither of them has one.

Last year I found a layer cake and a pattern to make one niece
her tree skirt.
The patter, layer cake, backing and binding fabrics were all in a bag
in my "kit cabinet", so they all came out to play.

Here is the finished tree skirt!


This tree skirt went together so quickly
and used such a neat way to cut the various pieces
from the layer cake.


The fabrics all have some sparkly gold in them
and really makes the tree skirt shine.


This tree skirt could be reversible, if desired.
The backing fabric has a whole lot of JOY in it!!


This will be put away until the next time I see my niece.
A little Christmas in the early part of the year will be fun.


Happy Quilting!

Monday, January 17, 2022

Farm Pinwheel Baby Quilt Finished

 This top was sewn together sometime last year and has been
waiting to be quilted and finished.
 
Last week was the time.
I pieced a backing and basted the layers together.
 
Now it's a finished baby quilt, ready for donation!


This top was made from a package of charm squares
and yardage.  Some of the farm fabrics are so cute!


I am really liking the simple grid quilting these days
and love how it looks with this design.


You can see a few of the farm prints in this photo.


The backing was pieced from fabric in my stash.
The blue is not this dark in person.
 
Green gingham binding was used to finish it 
and it's ready for donation.
 
I'm linking to Design Wall Monday today.
 
 
Happy Quilting!

Sunday, January 16, 2022

My Hidey Hole is Finished!

 I moved into my house back in April
and left a wonderful sewing room/office behind.
We were downsizing and that meant my sewing room
had to be smaller, too.

Well, there were several things needed in my new sewing room.
(Years ago my daughters started calling my sewing room
my Hidey Hole, and that's what it's been called since.)

The first thing my new hidey hole needed was a wall.
The room was probably an office for the previous owners
and was totally open to the front hall except for two huge pillars.
That would not work for my hidey hole!
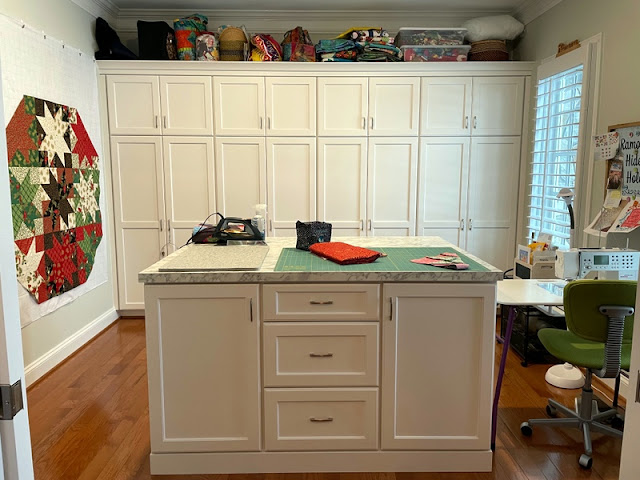
The second thing my new room needed was cabinets and a cutting table.
 
Finally in December, the work was done.
The cabinets were installed and the wall was built with two pocket doors.
 
Since then I have been unpacking, organizing and getting the room
set up and ready to use.
This morning I did the last thing I wanted to do.... hung the peg boards.
 
At first I was very hesitant about downsizing so much,
but I am thrilled with how the room came together.
One thing that will have to happen is I will need to keep it neat
and organized.  NOT my strong suit!
 
Anyway.... my Hidey Hole!!


I am so fortunate and thankful to have a room
dedicated to my sewing.
There was a time when the dining room table was my sewing space.


 Having my rulers out and easily accessible will be wonderful.


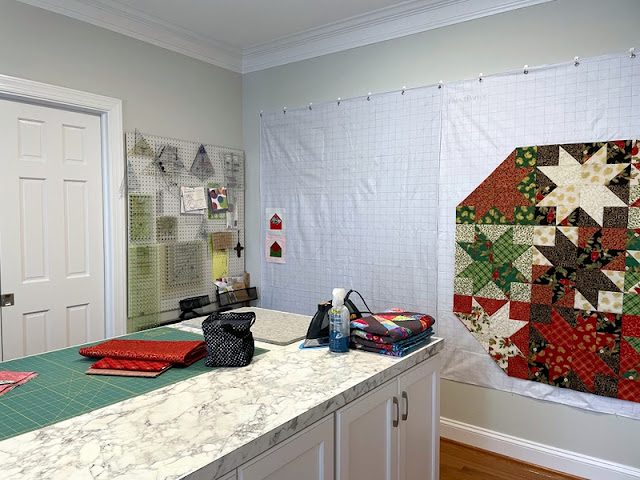
In my old house, my design wall was flannel covered insulation boards,
screwed to the wall.   I really like those, but over time the flannel
stretched and I couldn't easily remove the boards to replace it.
posted the design wall she uses and how she hung it.
I decided to give her method a try.


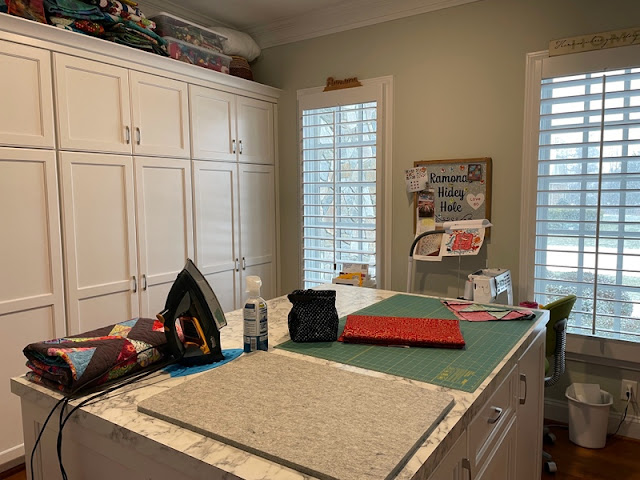
These two windows give the room a lot of natural light.
There are recessed lights for night time sewing.
The one challenge is there isn't really room for an
ironing board.  I bought a larger wool ironing mat
and will use the ironing board in the hallway when I
need something larger.


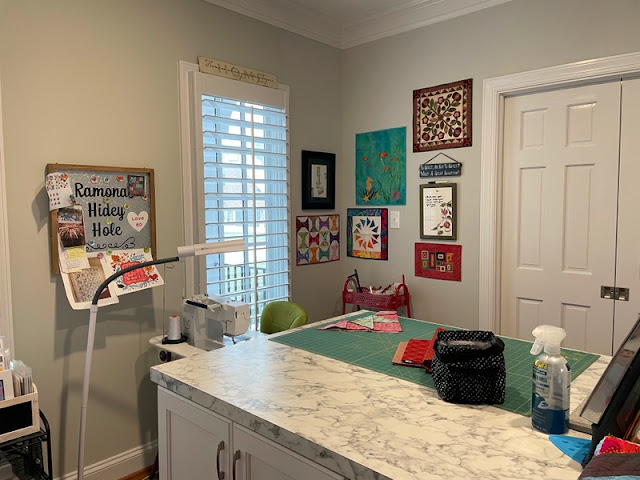
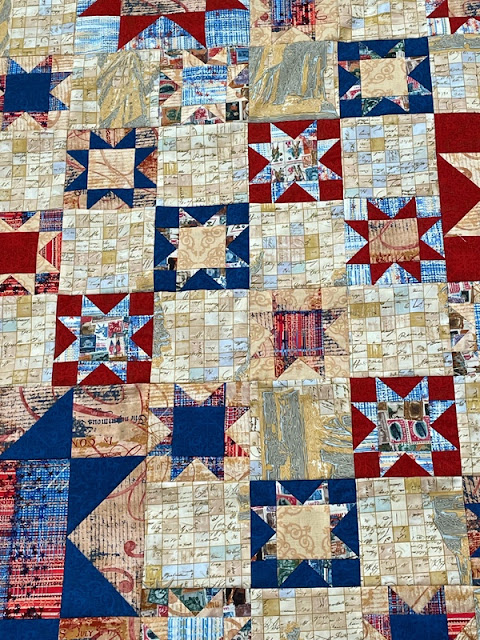
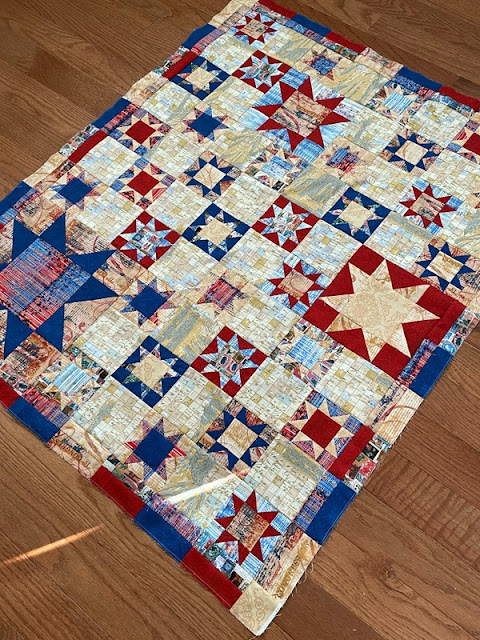
In my old hidey hole, I didn't have much wall space at all
and had nowhere to hang my little quilts.
I've started to hang them up and love how they brighten the room.
A friend made the magnetic board for my birthday last year. :)


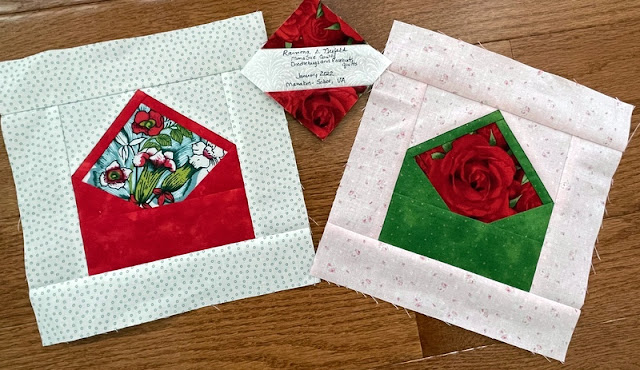
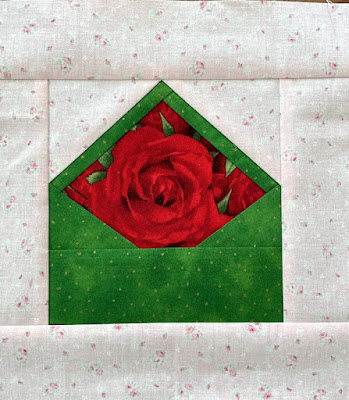
The creative juices are bursting now that my room is finished.
It will be fun to see what is created in here.
 
 
Happy Quilting!
 

Thursday, January 13, 2022

Sock Monkey Finish

 Can I just tell you about how thrilled I am
to be able to sew in my hidey hole again??!!
My room isn't quite finished,
but it is all set up for sewing.
And sewing I'm doing!

My soul is singing Hallelujah!


The second kit is finished and ready to give to my friend.
Years ago I made a sock monkey quilt for my bestest girl friend
and saved the remaining fabric thinking I would make a baby quilt
for her when she became a grandmother.

That day has come.
Her grandson was born at 30 weeks and was in the NICU
for over a month.
He is home and is doing really well
and his Gigi was thrilled to finally meet him and hold him.
It was time to make the quilt for her.

I had the three sock monkey fabrics in the bag
and pulled the rest from my stash.


There is something I just love about making quilts with triangle pieces.
It's fun to play with the placement of the fabrics
and see the quilt come together.


The three outer fabrics are the leftovers from my friends quilt.
They are interspersed among the triangles, too.


The backing was pieced from the remaining fabrics, 
plus a different piece I had in my stash.


This is all the fabric I have left.
These scraps will be cut into usable sizes and put away.
The photo below shows how much binding was left
after finishing the quilt.
PHEW!!


Onto the next project!
 
 
Happy Quilting!

Monday, January 10, 2022

Patriotic Quilt Finish

 I have the first finish of 2022 and the first
quilt totally made in my new Hidey Hole.
The room is pretty much put together and 
I am thrilled.
I need to put up a peg board wall and my design wall
and that's it!
My quilting mojo is back now that I have a room to use again!


Back to the quilt...


This was a kit I had purchased long ago.
I don't know where, or when or why.
This is not my typical type of quilt to make.

The kit quilt looked like this...


I knew it would be donated, but it wasn't that large.
Vicki suggested donating it to the local
Veterans Hospital, but it needed to be larger.

When I decided to do this,
I added the borders.

What a difference they made in the overall appearance!


I decided to quilt it with a grid and get if finished.
It's been a while since I've quilted anything,
so easy was the name of the game.


It took an evening to get it quilted
and I worked on the binding yesterday
while it rained.


The binding strips had been cut for the smaller, no border version,
so I needed to add one piece.
I had enough of one of the fabrics used and added
that for a bit of a scrappy binding.


The backing came from my stash and used up all of the stripe
and most of the solid blue.


It will be washed and delivered to Vicki to add to the quilts they donate.


I'm linking to Design Wall Monday today.

Happy Quilting!

Saturday, January 8, 2022

Kit #2

 After I posted my first quilt top finish for 2022 the other day,
Vicki suggested that, if the top is large enough,
I donate it to her quilt group that makes quilts for
the local Veterans hospital.

Well, the quilt top wasn't large enough,
so I added two solid borders.
I like it so much more now and will get
it quilted and sent to Vicki to donate.

Thanks, Vicki!


After adding the borders to the above quilt,
I went to the kit cabinet and pulled the next one to make.

This one is one I put together and have been waiting to make
it for some time.
My bestest friend LOVES sock monkeys.
Years ago I made her a sock monkey quilt
and have leftover fabric.
I knew that I would want to make a baby quilt
for her home when she became a grandmother
and the time is here!

Out came the fabrics,
along with my Accuquilt cutter
and the pieces are ready to arrange.


I had cut these triangles from scraps when I was putting 
all of the fabrics away, so they were ready to go.


Several of these fabrics I had placed in the bag with 
the cut triangles and the rest I pulled from my stash.


I love using the AccuQuilt to cut triangles
because it cuts notches and makes assembly very
easy and accurate.


 Now it's time to play!
I don't have a design wall yet,
so will need to use my design floor while
I'm watching college basketball this afternoon.


Happy Quilting!

Thursday, January 6, 2022

First Kit Done

 In my first blog post of 2022
I stated that one goal is to work on the 
cabinet of kits I've accumulated over the years.
There are purchased kits and kits I've put together.
 
The first kit is done! 
Well, it's a finished top, anyway.

This kit was purchased...
I don't remember where
and I'm really wondering why.
It is not anything I would buy today,
but it's done and will be quilted and donated.


This was actually a good one for me to start with
since it was small and easy to make.
I had to knock some rust off of my sewing!


I am not fond of the large square fabric at all,
but used it to move it out of my stash.


This quilt is not large so won't take me long to quilt it.


This year I was invited to join the Gridster Bee
and am so excited.  It's made up of quilters,
mostly in California,
but there are two of us who are not.
Each month someone is "Queen Bee"
and the others make blocks that she requests.
This month Patti chose Ayumi Takahashi Envelope pattern
from "Patchwork Please"
and asked that we think of them as "Love Letters".


These are paper pieced blocks and went together pretty quickly.


These will be mailed off to California today or tomorrow.


Happy Quilting!


Sunday, January 2, 2022

Olivia's Quiet Book

 One thing I have wanted to make
even before I had a grandchild is a 
felt Quiet Book.
 
I'd seen these online and have looked at many
patterns and pages.
 
My granddaughter turned one on Dec. 27th and
it was time for a quiet book!
 
I found this pattern on Etsy and a friend
helped me cut the pieces on her Cricut.
(Boy did THAT save some time!)
 
Because life has been crazy
I didn't get working on this until this past week.
 
It is finished and ready for delivery!
 
In making this, I learned many things
that I will use when I make more pages as 
Olivia gets older.
 
I hope she likes this as much as I enjoyed making it for her.


These are the pages of her book.
I decided to put them into a book form
differently so the pages can be removed
and added to easily.
The tabs on the left side have big button holes
and I made a strap to go through those to hold the pages together.

Some pages have little activities on them
and others have crinkle fabric between the felt pieces
or beads to move.

I know buttons should not be used for little ones,
but these are sewn on so tightly that I'm not sure
I could get them off if I needed to.


The lady bug has a little lady bug on
a ribbon behind the zipper.


The bee is velcroed in place with little
things to find under the flower petals.


The beads move under the netting on the fish.


The owls wings move up and down
and there are things to find in his belly.


The apples are velcroed in place on the hedgehog. 


 The door on the mushroom opens
and the beads spin.


I have the next set of pages picked out to make
and these will have more advanced activities
as Olivia gets older.

Happy Birthday, Olivia!!