As I mentioned a few blog posts ago,
my daughter and son-in-law bought a king size bed and
asked if I could make their queen size wedding quilt big
enough to fit their king size bed.
I ordered fabric, bought thread and took the binding off of the quilt.

I had a plan in my mind to add a piece of fabric on the top and the bottom
and sandwich the batting in between the two. After this the quilting would be done.
Well, what a disaster that was! Adding unquilted fabric to a quilted piece
made for a big mess! It almost looked pleated along the edges...
NOT the look I was going for with this quilt!
NOT the look I was going for with this quilt!
Off came the two pieces of fabric and plan B came to mind.
Instead, I would quilt a panel for each side
and add it with a strip of fabric on the front and the back.
So the quilting began.
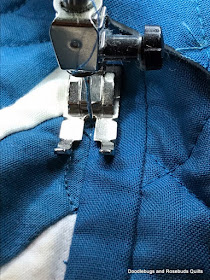
For some reason I have the hardest time quilting straight lines
with the guide and my walking foot.
If you don't know, using Frixion pens on solid fabrics leaves a mark
like the fabric has been bleached.
Out came my Clover chalk marker with the little wheel at the top.
It worked like a charm and as I quilted, the chalk came off
and could not be seen at all.
The panels were quilted and trimmed to size.
I cut two pieces of fabric with which to attach the panel to the quilt.
The top piece was cut 1 1/8" wide and the bottom piece was cut
1 5/8" wide and pressed in half length wise.
They were sewn onto the panel with 1/4" seam allowance.
The top strip was then sewn to the edge of the quilt with about a 3/8" seam allowance.
After sewing the panel to the quilt,
I pulled the panel into place and turned the quilt to the back.
Dots of glue were placed down the inside of the seam,
The folded strip sewn to the back of the panel
was pulled over the glue,
And ironed to seal the glue.
The quilt was turned back over to the top
and I stitched in the ditch to catch the backing strip.
(All the different colors of fabric in these photos is
so interesting. All photos were taken with my iphone, too.)
VOILA!!
The binding was then added and it's finished!
I am so excited that my plan worked.
(The quilt is flat! For some reason I didn't take
the time to pull it flat before taking these photos.)
I really like the cross-hatch quilting along the sides with
the swirl quilting in the body of the quilt.
I do not have a king size bed,
but this was after washing and drying the quilt.
It was a bit crumpled after taking it out of the dryer,
but will straighten out when it's on their bed.
Its all folded and ready for delivery.
This expansion took another 11 yards of fabric
and 6 small spools of thread.
If I'm ever asked to do this again,
I think it would be easier to make a new quilt!
Happy Quilting!


it looks good!
ReplyDelete.......BUT.....it turned out so well. That was a big job! Glad that it all worked out.
ReplyDeleteWonderful finishes! As soon as I started reading about the ruffling I thought "she should use a quilt-as-you-go method....and that's just what you did! Excellent. The chenille quilt may be have been a pain but it sure is cute....and nostalgic. Blessings... :)
ReplyDeleteYou are so brilliant! I would have just made a new quilt
ReplyDeleteA lot of work but it turned out great. A very special quilt. I hope I never have to do something like this but I did save your post on Pinterest just in case. Glad it all worked out.
ReplyDeleteTis a quilt of love! The things we do for our kids;)
ReplyDeleteSo glad that you were able to find a solution eventually that completed the size you needed.
It is still a beautiful design and I am sure one to be treasured.
It looks wonderful!
I did something similar to this; adding a "make it queen size" border. I should have done QAYG and it would have been easier. But my friend was very happy with it so....I won't do this again! Yours looks really nice.
ReplyDeleteThat's dedication! I'm impressed.
ReplyDeleteLOL!! I can totally see why next time you might want to make another quilt. This one was special, though, and you did a great job on the expansion project!
ReplyDeleteWow -- necessity truly is the mother of invention!! Had the original queen size quilt been washed? I would have worried that the newly added borders might shrink more than the main part of the quilt if it had already been washed before, but I don't see any signs that you had issues like that. What kind of batting did you use, and did you prewash/preshrink the fabrics and/or the batting for the new borders? Congratulations on a successful enlargement, AND on making a quilt that the recipients loved so much that they asked you to make it bigger when they got a bigger bed instead of just putting the quilt away in a closet!
ReplyDeleteBrilliant solution! I believe that re-making anything is harder than starting from scratch; you came up with such a great fix for this one, it looks great!
ReplyDeleteOh my goodness, Ramona. This is an amazing feat. Just the attempting of it. The fact that the resulting enlarged quilt is so neat and perfectly done is really the BOMB!!! Your workmanship is the stuff of dreams. I am sure every sewist/seamstress/quilter would be proud of you!!!
ReplyDeleteI would've told them - "use this as a lap quilt and I'll make you another for your bed." Kudos to you. Mind-blown!!!